- Click the Windows 7 or “Start” button at the lower left corner of your screen
- When the program list appears, Type “Snipping” in the “Search Programs and Files” textbox.
- Click “Snipping Tool” when it appears in the Programs list.
You can also navigate to the snipping tool program, but you may find it more difficult to locate the program when navigating through all the other programs and files listed on your computer.
- Click the Windows 7 “Start” button at the lower left corner of your screen
- Click on “All Programs > Accessories > Snipping Tool”
OPTIONAL TIP: If you plan to use the Windows snipping tool often you can drag the snipping tool icon to your Windows Toolbar where you can quickly and easily find it.
- In the Programs list, click “Snipping Tool” and while continue to hold your mouse button down, drag the Snipping Tool down to your Windows toolbar.
- When you release your mouse button, the Snipping Tool Icon will appear in your toolbar where you can easily use it without having to navigate.
How to Snip an Image from the Screen
First, display the screen on which the image appears that you would like to snip (capture)
- Click the Snipping Tool icon that you’ve placed in your Windows Toolbar or start the Windows Snipping tool using the steps described earlier. When the snipping tool starts, your entire screen will turn pale (as shown in this image)
- Place your mouse cursor at the top left corner of the image you would like to snip and hold down the mouse button.
- Drag the cursor to the lower right corner of the image you would like to snip, creating a “frame” around the image you would like to capture. In this example, I’ve “framed” three images of the Mona Lisa from the cover of a book.
When you release the mouse button, the image you have framed will appear in the snipping tool editor.
- Select “File”
- Select “Save As…”
- Optionally, you can click the disc icon on the Snipping Tool toolbar.
When the File Save dialog appears, be sure to REMEMBER where you saved your image.
By default, the Windows Snipping Tool saves images with a .PNG extension. This is fine, most programs
The Windows Snipping Tool has very limited options.
- The Windows Snipping tool lacks a “File Open” command so you can’t use the snipping tool to review or edit previously captured images.
- The e-mail function works only With Windows mail or client based email (not popular cloud mail programs such as gMail)
- You can use a pen tool and highlighter to mark the image, but there are no advanced marking tools such as squares, circles and arrows.
- By default, the Windows snipping tool saves images in PNG format, which should be fine since .PNG is a very popular image format.
- Click the dropdown to the right of “Save as Type” to save the image in some other format such as .GIF or .JPG
Now that your image is saved to a computer file, you can use it for your document or presentation. If you want to print it….
- When the programs dialog appers, click “computer” in the right column Note: A shortcut is to hold your Windows Key on your computer, then press “E” for “explore”
When the “Explore” dialog appears, navigate to the folder that contains the images…
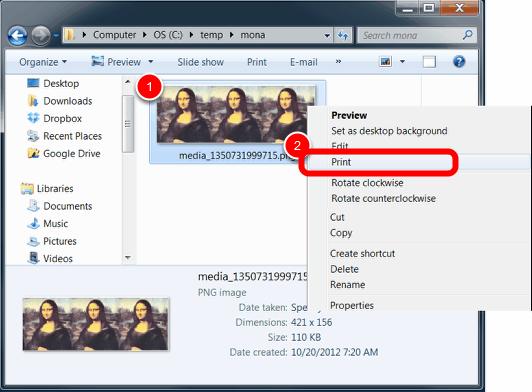
- LEFT click on the image you want to print. Note that you can hold down your shift key and LEFT-click on multiple images to print.
- When you’ve selected the image or images you want to print, RIGHT-click on any one of the selected images and select “Print” from the context menu.
- Select the target printer
- select the image format on the paper
- Select the number of copies for each picture
- Click the print button