WINDOWS DESKTOP ICONS for OBS Studio and PROJECTOR
OPERATING OBS / Open Broadcaster Software
OBS automatically starts with all the previous settings.
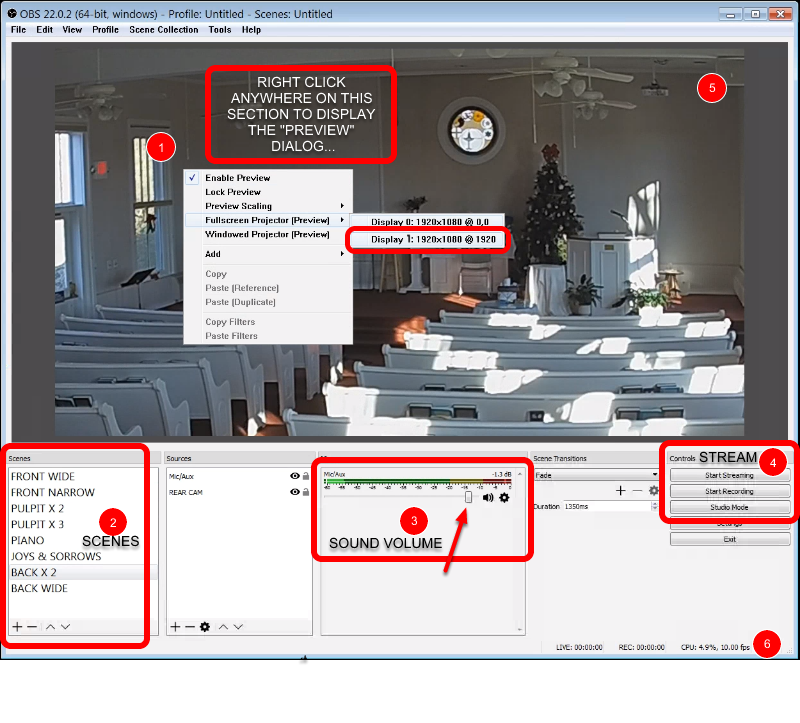
- LIVE VIDEO (PREVIEW). Right click on the top section of the screen to display the Preview dialog, then select Fullscreen Projector (Preview) > Display 1 to sends live video to other video screens in the building (Display 1 is the HDMI out from the computer that goes through an HDMI splitter to other TV’s in the building).
- SCENE: Click any row in the SCENE section to select a predefined view from the a camera
- MIC/AUX: Use the slider (see arrow) to make sure the volume is adequate for the other TV’s and YouTube stream.
- START STREAMING / START RECORDING – You need only click "START STREAMING". Recording to disk occurs automatically because of this setting: "File > Settings > General > Output > Automatically record when streaming"
- PAN & ZOOM: CLICK AND DRAG, anywhere to repositon the scene. Note that you can drag the view to display a corner, then click and drag any corner to resize (ZOOM) the scene.
- STREAMING STATISTICS are displayed at the lower right corner of the screen
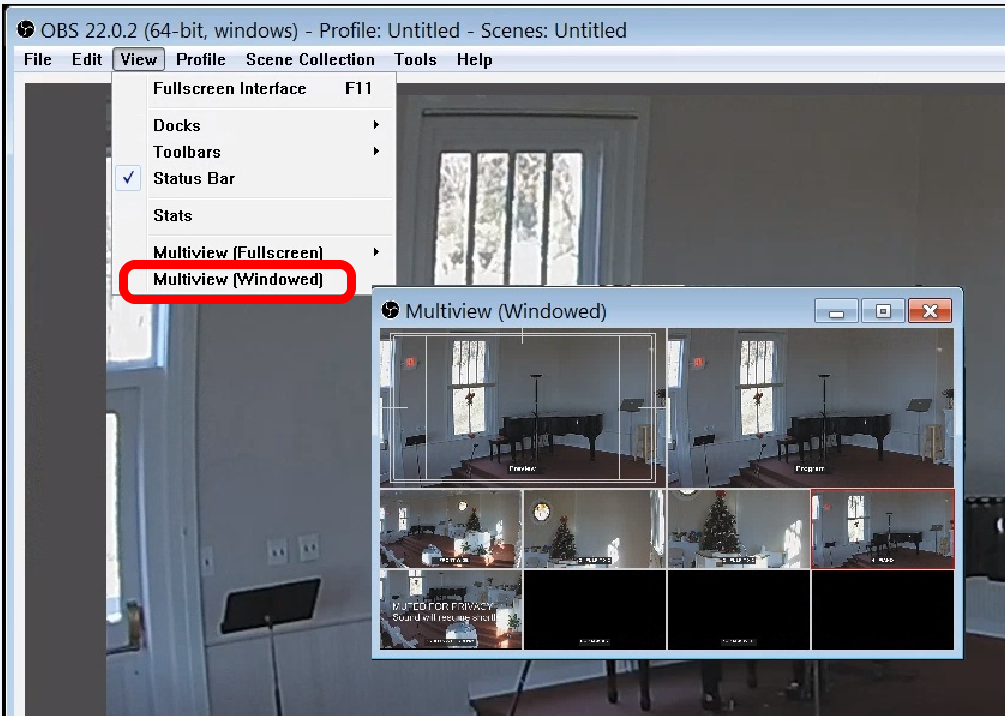
View > Multiview (Windowed) (OPTIONAL)
I don’t find any value in displaying this Multiview Preview since the "SCENES" already have well defined titles. But here’s how to display the Multiview, if you want to use it.
File > Settings > General (No changes)

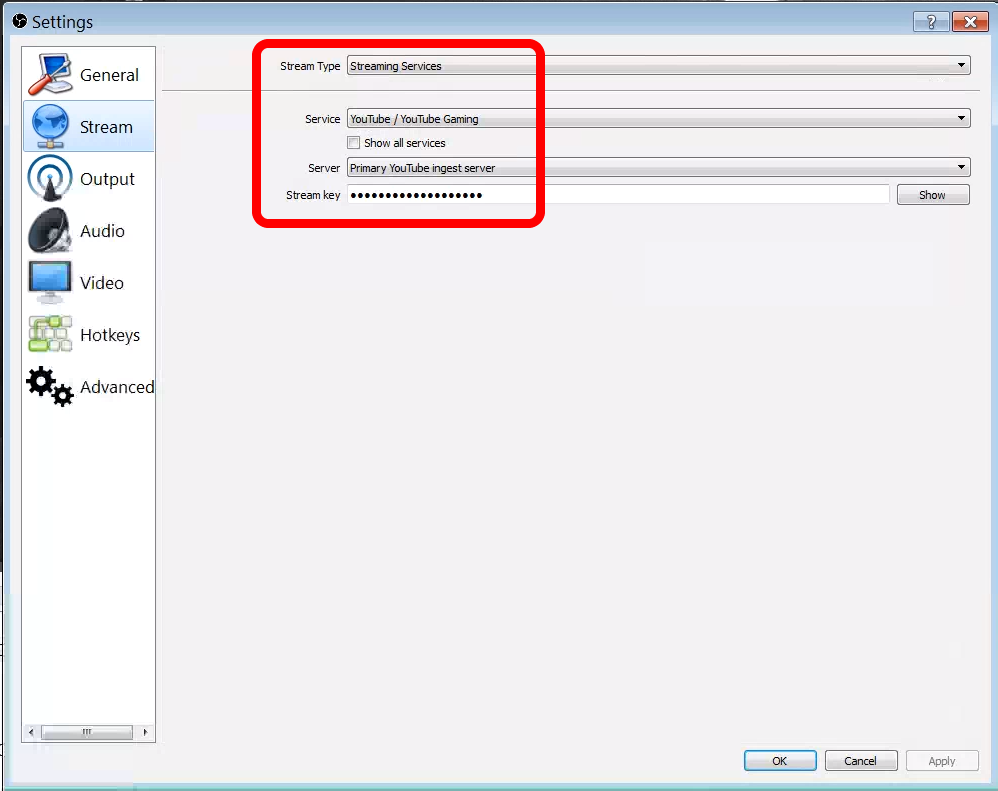
File > Settings > Stream
The "Stream Key" is provided to you by YouTube when setting up a YouTube Creator account.
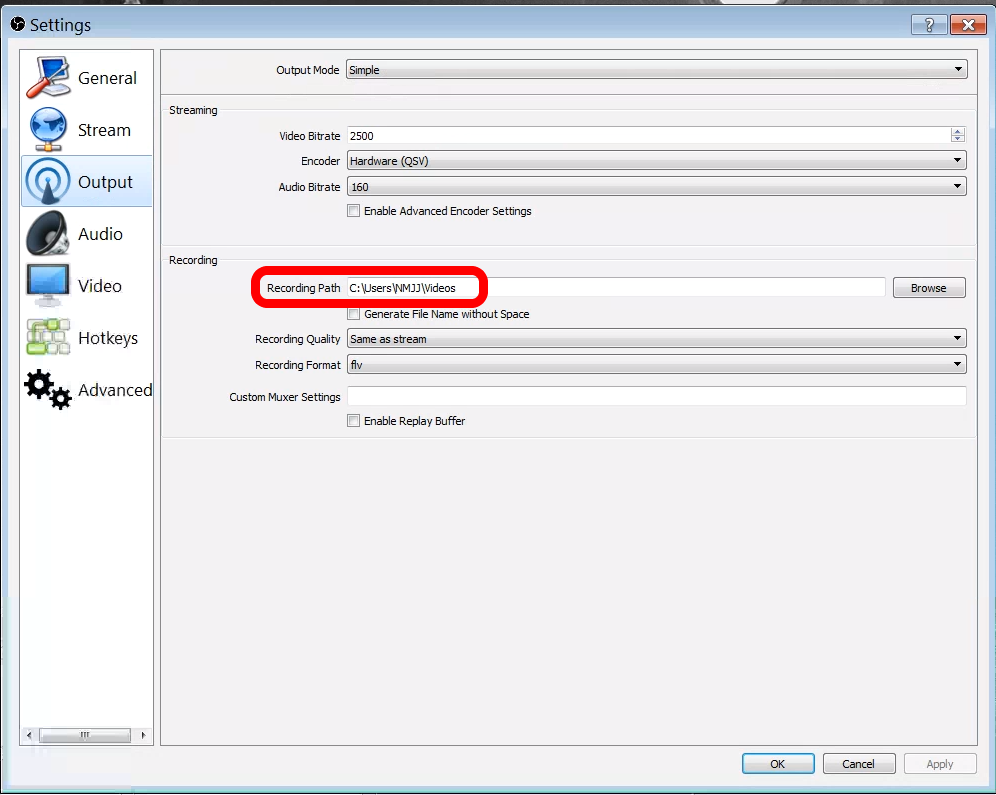
File > Settings > Output
Recording Path is where recorded video is stored on the local computer.
File > Settings > Audio (No changes)
File > Settings > Video (No changes)
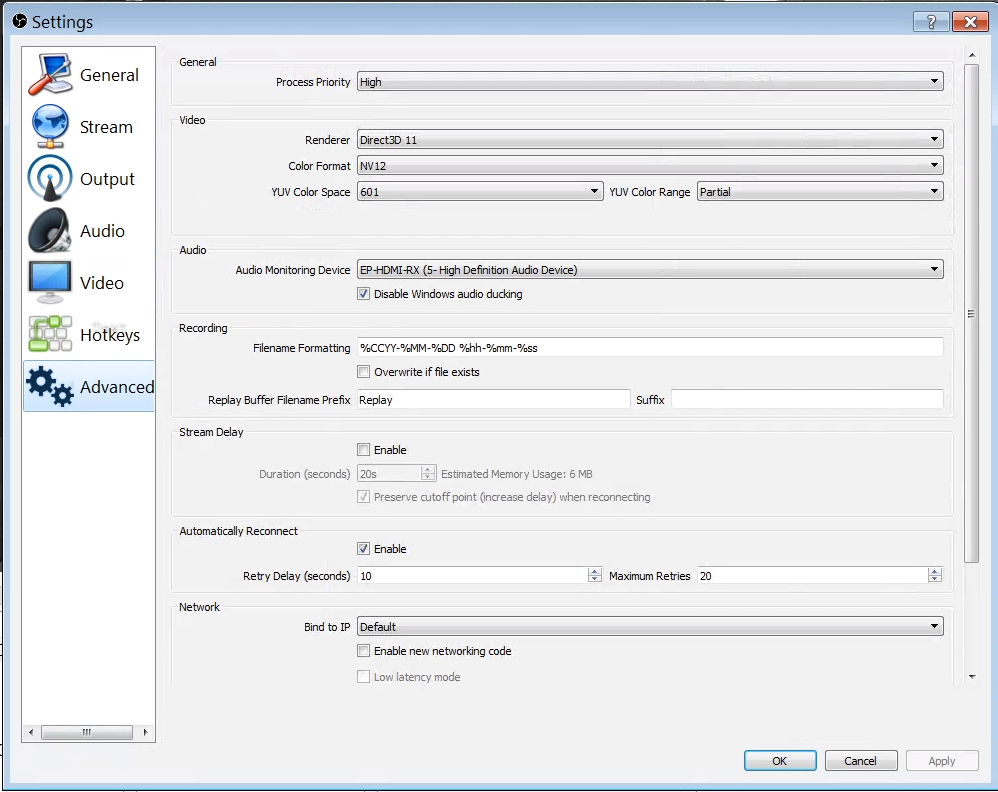
File > Settings > Advanced